Granted, I am only 23 years-old and have maybe a friend or two with kids, so this isn’t the biggest surprise. This was also a small office occasion for that would be no different than any other work gathering. Still, I was missing a few pieces of the “culture puzzle” so I decided to shy away from tradition; there was no need to make this overcomplicated.
That led to my “duh” moment on what to bake: “simple and classic”. The gifts at a baby shower don’t have to be spectacular, for aren’t we already celebrating life’s greatest gift? An emblem of love, family, and renewal, this is one gift that no amount of money can buy. So, I harnessed the inspiration of my greatest gift, my Mom, to create a “simple and classic” cake: Vanilla Layer Cake with Chocolate Frosting and Chocolate-Covered Strawberries. Okay, so I got a little fancy with the strawberries, but I just couldn’t resist. This recipe was adapted from my favorite blog, SmittenKitchen - I used a basic chocolate buttercream recipe, added strawberries, and made 1 1/2 of the recipe to create three layers as opposed to just two. Enjoy!
Vanilla Cake with Chocolate Frosting and Chocolate-Covered Strawberries
Vanilla Cake with Chocolate Frosting and Chocolate-Covered Strawberries
Adapted via SmittenKitchen
Yields: Three 9-inch round, 2-inch tall cake layers
Ingredients:
For Cake:
- 6 cups plus 2 tablespoons cake flour (not self-rising)
- 3 teaspoons baking powder
- 2 1/4 teaspoons baking soda
- 1 1/2 teaspoon salt
- 3 sticks (1 1/2 cups) unsalted butter, softened
- 3 cups sugar
- 3 teaspoons pure vanilla extract
- 6 large eggs, at room temperature
- 3 cups buttermilk, well-shaken
- 6 large strawberries, thinly sliced
For Frosting:
- 2 cups unsalted butter-
- 3 tablespoons milk
- 12 ounces semisweet chocolate, chopped
- 1 1/2 teaspoons vanilla extract
- 3 cups sifted powdered sugar
Strawberries
- 12 large strawberries
- 1 cup chocolate melting discs (or chocolate chips)
Directions:
For chocolate-covered strawberries: Place chocolate in a microwave-safe bowl, and microwave at 20-second intervals until fully melted; stirring in between. Let cool for 5 minutes. Dip one strawberry at a time into melted chocolate, and place on wax paper/plate to cool; set aside.
For cake: Preheat oven to 350°F. Butter two 9-inch round cake pans and line with circles of parchment paper, then butter parchment. (Alternately, you can use a cooking spray, either with just butter or butter and flour to speed this process up.)
Sift together flour, baking powder, baking soda, and salt in a medium bowl. In a large mixing bowl, beat butter and sugar in a large bowl with an electric mixer at medium speed until pale and fluffy, then beat in vanilla. Add eggs 1 at a time, beating well and scraping down the bowl after each addition. At low speed, beat in buttermilk until just combined (mixture will look curdled). Add flour mixture in three batches, mixing until each addition is just Incorporated.
Spread batter evenly in cake pan, then rap pan on counter several times to eliminate air bubbles. (I like to drop mine a few times from two inches up, making a great big noisy fuss.) Bake until golden and a wooden pick inserted in center of cake comes out clean, 35 to 40 minutes. Cool in pan on a rack 10 minutes, then run a knife around edge of pan. Invert onto rack and discard parchment, then cool completely, about 1 hour.
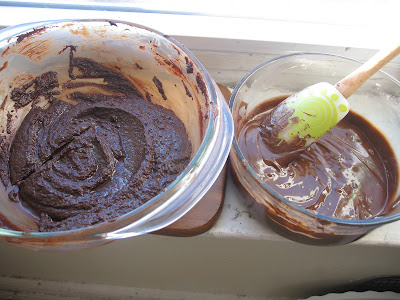
For chocolate frosting: Place chocolate in a microwave-safe bowl, and microwave at 20-second intervals until fully melted; stirring in between. Let cool for 10 minutes. In a large mixing bowl, beat the butter using an electric mixer on MEDIUM speed for about 3 minutes or until creamy. Add the milk carefully and beat until smooth.
Add the melted chocolate and beat well for 2 minutes. Add the vanilla and beat for 3 minutes. Gradually add in the sugar and beat on LOW speed until creamy and of desired consistency.
For assembly: level cakes with a serrated knife if they had domed during baking. Place one layer on a platter and spread 1 cup frosting across, then arrange a layer of sliced strawberries over frosting; repeat with the second layer. Top with third layer, and frost cake all over with remaining frosting. Assemble chocolate-covered strawberries on top and serve.


